2.565 results (0,13052 seconds)

Brand

Merchant

Price (EUR)

Reset filter

Products
From
Shops

Triumph 2000 DIY roll cage kit - bolt in fitment

Triumph 2000 DIY roll cage kit - bolt in fitment

THIS IS A JOB FOR COMPETENT FABRICATORS ONLY! FITTING AVAILABLE Whats included? MRB – MAIN ROLL BAR LAB/RAB – LEFT/RIGHT A BARS (LATERAL ROLLBARS) RFB – ROOFBAR RB/LB – RIGHT/LEFT BACKSTAY (REAR LEGS) D1, – DIAGONAL1 (D1 TOP ALLWAYS GOES OVER DRIVERS HEAD) LH/RH – LEFT/RIGHT HARNESS BAR LD/RD – LEFT/RIGHT DOORBAR 8 PAIRS  OF 45MM SADDLE CLAMPS (MALE SADDLE ALWAYS FACES INSIDE THE CAR) MOUNTS AND FOOT PLATES NUTS AND BOLTS NOTE. SOME FETTLING MAY BE REQUIRED & ALL TUBES/ PLATES MUST BE CLEANED AND PREPPED READY FOR WELDING PRIOR TO ASSEMBLY. -This kit is Designed for easy assembly for anyone with welding and fabrication abilities.   -The Kit is CNC notched, marked and labelled.   -Look at the images below for reference as to where the mounts sit, use this to gauge where to remove unused body components from, give your self a good size area to work with, then clean all the paint from the chassis in the areas of mounting, this will save lots of time.   All mounts will have a captive nut which needs to face down in the car   using the images as a reference tack the hoop mounts in place ( you may need to mark and drill holes for the captive nuts to set into)   bolt the matching footplate on top   Position MRB onto the mounts ensuring the positioning markers at the top are facing the back for the backstays and tack the inside of each leg enough to secure the hoop under its own weight but still allow movement.   offer LB/RB up to the hoop and gauge where it will land and mark it   the distance between the 2 backstays at the bottom should be 1160mm centres   mark this and position your rear mounts and feet accordingly (120x60mm 3 mm rectangle plates with 3 holes)   now position LB and RB tacking them in place, check D1 lines up with the markers.   offer LAB or RAB into position to check hoop position looks correct   using the doorbars as a reference mark the landing position of your front feet and tack the mounts in position.   once the front mounts are tacked in you can fit the LAB & RAB tacking the front leg to the foot plate and using the saddle clamps to join to the hoop ( rotate saddle to get best possible fitment )   loosely clamp a pair of saddle clamps to each end of the RFB   lift the bar into place over head so it is as close to the roof structure as possible ( you need clearance to remove and fit)   now fit the doorbars with the saddle clamps on each end   once everything is tacked inside the car, weld everything that is easy access, but not the saddle clamps (you may weld both together so you cannot separate)   make sure the saddles have decent tacks on so they dont break.   once you are happy the cage is secure unbolt it and remove to complete the rest of the welding including the saddle clamps   be mind-full that your cage may contract after welding so recheck the mounts after the cage is welded before welding the mounts in place.   once happy the mounts still line up fully weld them in place

GBP 756.00
1

SUZUKI JIMNY DIY WELD IN INTERNAL HALF CAGE KIT (Material: LIGHTWEIGHT BS4-T45 - Unapproved for competition)

SUZUKI JIMNY DIY WELD IN INTERNAL HALF CAGE KIT (Material: LIGHTWEIGHT BS4-T45 - Unapproved for competition)

Whats included? X Bracing components Main roll bar Left and right back stays Harness bars Mounting boxes/plates This kit is Designed for easy assembly for anyone with welding and fabrication abilities. The Kit is CNC notched, marked and labelled.     Use the images for reference on mount positions, the front mounts push into the corners and you position the hoop on top to suit. Look at the images below for reference as to where the mounts sit, use this to gauge where to clean the paint/sealer from, give your self a good size area to work with, this will save lots of time, then your mounts can be tacked straight down to build up from. once prepped tack your front mounts in place as shown in the attached images, after cleaning all the ends of your tubes offer the hoop into position and tack it in place just to allow some movement of lean angle. Offer your rear legs up to the positioning marks (RB and LB), your D1 should line up to the positioning marks, once in place you can then offer your D2 and D3 to create the X, the trick is to symmetrise the top and bottom and then pull the middles inline with a straight edge angle jig or eye it up with a straight edge to ensure the line is true. so long as the cage looks even/symmetrical thats all okay. once your happy that everything lines up in the correct place in the car you can weld the joins as you go to ensure everything is welded before covering the joins with another tube. you now have the cage positioned with its X, now you should have LH & RH , left, these are 38mm and are the harness bars, simply tack the LH and RH ones at the outside join only measuring from the foot up to ensure the height is equal from left to right, then apply a level across the back of the cage so you can eye up your straight line in the middle, you may need to fettle a little bit until you’ve got equal heights all the way across from left to right. Abbreviations:- MRB – Main Roll Bar LB/RB – Left/right backstay D1, D2, D3 – Diagonal 1 2 and 3 (D1 allways goes top over driver head) LH RH – Left / right HARNESS BAR

GBP 522.59
1

BMW E46 COMPACT BOLT IN COMPETITION CAGE (Design Options: JPC2 - Single Doorbars, X Rear)

MK2 Triumph Spitfire Weld in Roll Cage kit (Material: Standard CDS, Fitting: Yes)

MK2 Triumph Spitfire Weld in Roll Cage kit (Material: Standard CDS, Fitting: Yes)

THIS IS A JOB FOR COMPETENT FABRICATORS ONLY! FITTING AVAILABLE Whats included? MRB – MAIN ROLL BAR LAB/RAB – LEFT/RIGHT A BARS (LATERAL ROLLBARS) RFB – ROOFBAR RB/LB – RIGHT/LEFT BACKSTAY (REAR LEGS) D1 – MAIN DIAGONALS (D1 TOP ALLWAYS GOES OVER DRIVERS HEAD) HB – HARNESS BAR LD/RD – LEFT/RIGHT DOORBARS LBP/RBP – LEFT/RIGHT B PILLAR DIAGONALS (HEAD HEIGHT CORNER BRACES BEHIND DRIVER AND PASSENGER HEAD) MOUNTS AND FOOT PLATES NOTE. SOME FETTLING MAY BE REQUIRED & ALL TUBES/ PLATES MUST BE CLEANED AND PREPPED READY FOR WELDING PRIOR TO ASSEMBLY. -This kit is Designed for easy assembly for anyone with welding and fabrication abilities.   -The Kit is CNC notched, marked and labelled.   -Look at the images below for reference as to where the mounts sit, use this to gauge where to remove unused body components from, give your self a good size area to work with, then clean all the paint from the chassis in the areas of mounting, this will save lots of time.   -Using the images for reference position the hoop mounts in the car (may require some fettling to get a snug fit for welding)   -Your mounts can be tacked straight down to build up from.   -Now position the main roll bar (MRB) on the mount. Tack the bottom allowing movement to set the lean angle.   offer the LAB and LD to gauge the position of landing for the foot of LAB, mark this and then tack your front mount below it, measure the position and copy it on the drivers side (some trimming may be required for floor shape)   Now the front mounts are tacked in fit the front A bars (LAB/RAB) and the doorbars to ensure correct positioning. (ensure the A pillar is parallel to the tube and looks a nice fitment)   once this is secure fit RFB and tack in place.   once you have all roof components and doorbars in place you can weld around all visible joins. DO NOT WELD TUBES TO THE MOUNTS!   now the front is welded you can squeeze the cage together with a strap to give access to the joins between the body.   once the cage is fully welded you can remove the strap and push the legs back where they belong and fully weld them in place.   with the front of the cage fully welded and in position you can now build up the rest of the cage.   for the rear backstays, use the images for reference, the diagonals will help you set the correct width and the length of the bars will tell you where to land on the arch/strut. You will need to trim a small amount off the body where the backstay touches to allow the legs to land properly on the mount   the width between the 2 rear stay feet should be 1020mm centres   Offer your rear legs up to the positioning marks (RB and LB), tack them in place, then fit the any diagonal as required.   all additional bars can be located using the positioning marks and some element of common sense.   ensure everything is fully welded,  clean all the spatter and shes done!

GBP 1512.00
1

MK2 Triumph Spitfire Weld in Roll Cage kit (Material: Standard CDS, Fitting: No)

MK2 Triumph Spitfire Weld in Roll Cage kit (Material: Standard CDS, Fitting: No)

THIS IS A JOB FOR COMPETENT FABRICATORS ONLY! FITTING AVAILABLE Whats included? MRB – MAIN ROLL BAR LAB/RAB – LEFT/RIGHT A BARS (LATERAL ROLLBARS) RFB – ROOFBAR RB/LB – RIGHT/LEFT BACKSTAY (REAR LEGS) D1 – MAIN DIAGONALS (D1 TOP ALLWAYS GOES OVER DRIVERS HEAD) HB – HARNESS BAR LD/RD – LEFT/RIGHT DOORBARS LBP/RBP – LEFT/RIGHT B PILLAR DIAGONALS (HEAD HEIGHT CORNER BRACES BEHIND DRIVER AND PASSENGER HEAD) MOUNTS AND FOOT PLATES NOTE. SOME FETTLING MAY BE REQUIRED & ALL TUBES/ PLATES MUST BE CLEANED AND PREPPED READY FOR WELDING PRIOR TO ASSEMBLY. -This kit is Designed for easy assembly for anyone with welding and fabrication abilities.   -The Kit is CNC notched, marked and labelled.   -Look at the images below for reference as to where the mounts sit, use this to gauge where to remove unused body components from, give your self a good size area to work with, then clean all the paint from the chassis in the areas of mounting, this will save lots of time.   -Using the images for reference position the hoop mounts in the car (may require some fettling to get a snug fit for welding)   -Your mounts can be tacked straight down to build up from.   -Now position the main roll bar (MRB) on the mount. Tack the bottom allowing movement to set the lean angle.   offer the LAB and LD to gauge the position of landing for the foot of LAB, mark this and then tack your front mount below it, measure the position and copy it on the drivers side (some trimming may be required for floor shape)   Now the front mounts are tacked in fit the front A bars (LAB/RAB) and the doorbars to ensure correct positioning. (ensure the A pillar is parallel to the tube and looks a nice fitment)   once this is secure fit RFB and tack in place.   once you have all roof components and doorbars in place you can weld around all visible joins. DO NOT WELD TUBES TO THE MOUNTS!   now the front is welded you can squeeze the cage together with a strap to give access to the joins between the body.   once the cage is fully welded you can remove the strap and push the legs back where they belong and fully weld them in place.   with the front of the cage fully welded and in position you can now build up the rest of the cage.   for the rear backstays, use the images for reference, the diagonals will help you set the correct width and the length of the bars will tell you where to land on the arch/strut. You will need to trim a small amount off the body where the backstay touches to allow the legs to land properly on the mount   the width between the 2 rear stay feet should be 1020mm centres   Offer your rear legs up to the positioning marks (RB and LB), tack them in place, then fit the any diagonal as required.   all additional bars can be located using the positioning marks and some element of common sense.   ensure everything is fully welded,  clean all the spatter and shes done!

GBP 693.00
1

BMW E46 COMPACT BOLT IN COMPETITION CAGE (Design Options: JPC2 - Single Doorbars, X Rear, Colour: Unpainted)

Mercedes 190E Weld in Roll Cage kit (Material: Standard CDS, Fitting: No)

Mercedes 190E Weld in Roll Cage kit (Material: Standard CDS, Fitting: No)

THIS IS A JOB FOR COMPETENT FABRICATORS ONLY! FITTING AVAILABLE Whats included? MRB – MAIN ROLL BAR LAB/RAB – LEFT/RIGHT A BARS (LATERAL ROLLBARS) RFB – ROOFBAR RB/LB – RIGHT/LEFT BACKSTAY (REAR LEGS) D1,D2 &D3 – MAIN DIAGONALS (D1 TOP ALLWAYS GOES OVER DRIVERS HEAD) LH/RH – LEFT/RIGHT HARNESS BAR CD1,CD2 &CD3 – CENTRE DIAGONALS ( D1 TOP ALLWAYS GOES OVER DRIVERS HEAD) LUD/RUD – LEFT/RIGHT UPPER DOORBARS LLD/RLD – LEFT RIGHT LOWER DOORBARS RAPS/LAPS – LEFT/RIGHT A PILLAR SUPPORTS (PIT PROPS) RLAPS/LLAPS – LEFT RIGHT LOWER A PILLAR SUPPORTS (SMALL PEICE BETWEEN UPPER AND LOWER DOORBAR) LBP/RBP – LEFT/RIGHT B PILLAR DIAGONALS (HEAD HEIGHT CORNER BRACES BEHIND DRIVER AND PASSENGER HEAD) RD1,RD2 &RD3 – ROOF DIAGONALS (FRONT OF D1 ALWAYS DRIVERS SIDE) RRT/LRT – LEFT AND RIGHT REAR TRIANGULATION LFT/RFT – LEFT AND RIGHT FRONT TRIANGULATION WILL NEED SHAPING TO SUIT TURRETS) DB – DASH BAR CURVED CENTRE X GUSSETS DOORBAR GUSSETS 40MM A PILLAR GUSSETS  MOUNTS AND FOOT PLATES NOTE. SOME FETTLING MAY BE REQUIRED & ALL TUBES/ PLATES MUST BE CLEANED AND PREPPED READY FOR WELDING PRIOR TO ASSEMBLY. -This kit is Designed for easy assembly for anyone with welding and fabrication abilities.   -The Kit is CNC notched, marked and labelled.   -Look at the images below for reference as to where the mounts sit, use this to gauge where to remove unused body components from, give your self a good size area to work with, then clean all the paint from the chassis in the areas of mounting, this will save lots of time.   -For the main hoop mounts you need to neatly cut away part of the sheet metal as shown in the photos, this allows you to slide the mount in half and half, you can weld this to the mount once in place after the steps below.   -Your mounts can be tacked straight down to build up from.   -Now position the main roll bar (MRB) on the mount. Tack the bottom allowing movement to set the lean angle.   offer the LAB and LLD to gauge the position of landing for the foot of LAB, mark this and then tack your front mount below it, measure the position and copy it on the drivers side (some trimming may be required for floor shape)   Now the front mounts are tacked in fit the front A bars (LAB/RAB) and the doorbars to ensure correct positioning.   once this is secure fit all roof components and tack in place.   once you have all roof components and doorbars in place you can weld around all visible joins. DO NOT WELD ROUND THE MOUNTS OR FEET!   now you can break the mounts off the body and cage to remove, dropping the cage and allowing movement, you may need to ratchet strap the cage inwards to allow free movement to move the cage where needed to access all the hidden joins.   once the cage is fully welded you can lift the cage back up and re fit the mounts, ensuring to weld any joins before covering them up with the tube.   with the front of the cage fully welded and in position you can now build up the rest of the cage.   for the rear backstays, use the images for reference, the diagonals will help you set the correct width and the length of the bars will tell you where to land on the arch/strut.   Offer your rear legs up to the positioning marks (RB and LB), tack them in place, then fit the any diagonals as required.   all additional bars can be located using the positioning marks and some element of common sense.   ensure everything is fully welded, now fit any door bar gussets and pillar gussets, clean all the spatter and shes done!

GBP 1890.00
1

Mercedes 190E Weld in Roll Cage kit (Material: Standard CDS, Fitting: Yes)

Mercedes 190E Weld in Roll Cage kit (Material: Standard CDS, Fitting: Yes)

THIS IS A JOB FOR COMPETENT FABRICATORS ONLY! FITTING AVAILABLE Whats included? MRB – MAIN ROLL BAR LAB/RAB – LEFT/RIGHT A BARS (LATERAL ROLLBARS) RFB – ROOFBAR RB/LB – RIGHT/LEFT BACKSTAY (REAR LEGS) D1,D2 &D3 – MAIN DIAGONALS (D1 TOP ALLWAYS GOES OVER DRIVERS HEAD) LH/RH – LEFT/RIGHT HARNESS BAR CD1,CD2 &CD3 – CENTRE DIAGONALS ( D1 TOP ALLWAYS GOES OVER DRIVERS HEAD) LUD/RUD – LEFT/RIGHT UPPER DOORBARS LLD/RLD – LEFT RIGHT LOWER DOORBARS RAPS/LAPS – LEFT/RIGHT A PILLAR SUPPORTS (PIT PROPS) RLAPS/LLAPS – LEFT RIGHT LOWER A PILLAR SUPPORTS (SMALL PEICE BETWEEN UPPER AND LOWER DOORBAR) LBP/RBP – LEFT/RIGHT B PILLAR DIAGONALS (HEAD HEIGHT CORNER BRACES BEHIND DRIVER AND PASSENGER HEAD) RD1,RD2 &RD3 – ROOF DIAGONALS (FRONT OF D1 ALWAYS DRIVERS SIDE) RRT/LRT – LEFT AND RIGHT REAR TRIANGULATION LFT/RFT – LEFT AND RIGHT FRONT TRIANGULATION WILL NEED SHAPING TO SUIT TURRETS) DB – DASH BAR CURVED CENTRE X GUSSETS DOORBAR GUSSETS 40MM A PILLAR GUSSETS  MOUNTS AND FOOT PLATES NOTE. SOME FETTLING MAY BE REQUIRED & ALL TUBES/ PLATES MUST BE CLEANED AND PREPPED READY FOR WELDING PRIOR TO ASSEMBLY. -This kit is Designed for easy assembly for anyone with welding and fabrication abilities.   -The Kit is CNC notched, marked and labelled.   -Look at the images below for reference as to where the mounts sit, use this to gauge where to remove unused body components from, give your self a good size area to work with, then clean all the paint from the chassis in the areas of mounting, this will save lots of time.   -For the main hoop mounts you need to neatly cut away part of the sheet metal as shown in the photos, this allows you to slide the mount in half and half, you can weld this to the mount once in place after the steps below.   -Your mounts can be tacked straight down to build up from.   -Now position the main roll bar (MRB) on the mount. Tack the bottom allowing movement to set the lean angle.   offer the LAB and LLD to gauge the position of landing for the foot of LAB, mark this and then tack your front mount below it, measure the position and copy it on the drivers side (some trimming may be required for floor shape)   Now the front mounts are tacked in fit the front A bars (LAB/RAB) and the doorbars to ensure correct positioning.   once this is secure fit all roof components and tack in place.   once you have all roof components and doorbars in place you can weld around all visible joins. DO NOT WELD ROUND THE MOUNTS OR FEET!   now you can break the mounts off the body and cage to remove, dropping the cage and allowing movement, you may need to ratchet strap the cage inwards to allow free movement to move the cage where needed to access all the hidden joins.   once the cage is fully welded you can lift the cage back up and re fit the mounts, ensuring to weld any joins before covering them up with the tube.   with the front of the cage fully welded and in position you can now build up the rest of the cage.   for the rear backstays, use the images for reference, the diagonals will help you set the correct width and the length of the bars will tell you where to land on the arch/strut.   Offer your rear legs up to the positioning marks (RB and LB), tack them in place, then fit the any diagonals as required.   all additional bars can be located using the positioning marks and some element of common sense.   ensure everything is fully welded, now fit any door bar gussets and pillar gussets, clean all the spatter and shes done!
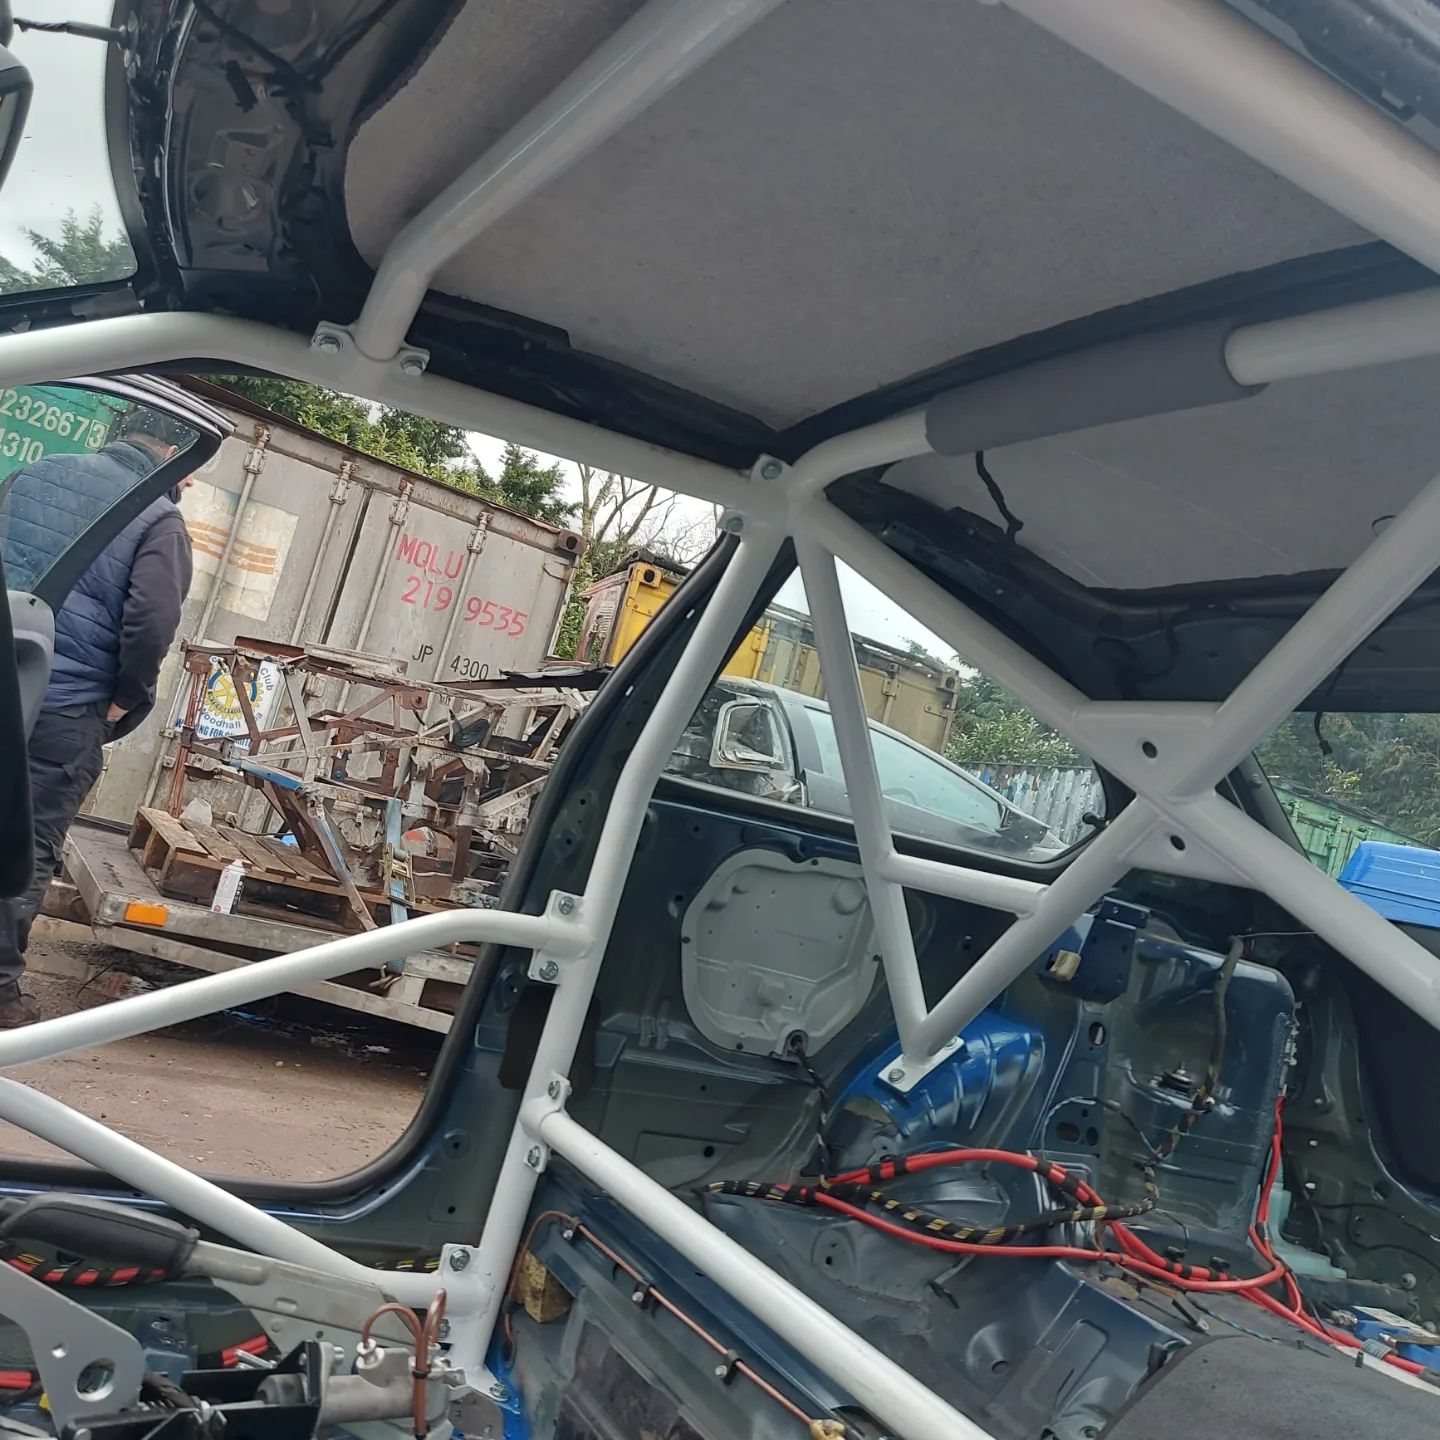
GBP 3150.00
1

BMW E46 COMPACT BOLT IN COMPETITION CAGE (Design Options: JPC3 - X rear, Double doorbars and centre brace)

BMW E46 COMPACT BOLT IN COMPETITION CAGE (Design Options: JPC1.5 (single diagonal, harness bar and single doorbars))

BMW E46 COMPACT BOLT IN COMPETITION CAGE (Design Options: JPC2 - Single Doorbars, X Rear, Colour: Specific RAL)

BMW E46 COMPACT BOLT IN COMPETITION CAGE (Design Options: JPC4 - X REAR, DOUBLE DOORBARS, A PILLAR SUPPORTS)

BMW E46 COMPACT BOLT IN COMPETITION CAGE (Design Options: JPC2 - Single Doorbars, X Rear, Colour: Specific Metallic RAL)

BMW E46 COMPACT BOLT IN COMPETITION CAGE (Design Options: JPC4 - X REAR, DOUBLE DOORBARS, A PILLAR SUPPORTS, Colour: Unpainted)

BMW E46 COMPACT BOLT IN COMPETITION CAGE (Design Options: JPC3 - X rear, Double doorbars and centre brace, Colour: Unpainted)

BMW E46 COMPACT BOLT IN COMPETITION CAGE (Design Options: JPC1.5 (single diagonal, harness bar and single doorbars), Colour: Unpainted)

MK2 Triumph Spitfire Weld in Roll Cage kit (Material: LIGHTWEIGHT BS4-T45 - Unapproved for competition, Fitting: No)

MK2 Triumph Spitfire Weld in Roll Cage kit (Material: LIGHTWEIGHT BS4-T45 - Unapproved for competition, Fitting: No)

THIS IS A JOB FOR COMPETENT FABRICATORS ONLY! FITTING AVAILABLE Whats included? MRB – MAIN ROLL BAR LAB/RAB – LEFT/RIGHT A BARS (LATERAL ROLLBARS) RFB – ROOFBAR RB/LB – RIGHT/LEFT BACKSTAY (REAR LEGS) D1 – MAIN DIAGONALS (D1 TOP ALLWAYS GOES OVER DRIVERS HEAD) HB – HARNESS BAR LD/RD – LEFT/RIGHT DOORBARS LBP/RBP – LEFT/RIGHT B PILLAR DIAGONALS (HEAD HEIGHT CORNER BRACES BEHIND DRIVER AND PASSENGER HEAD) MOUNTS AND FOOT PLATES NOTE. SOME FETTLING MAY BE REQUIRED & ALL TUBES/ PLATES MUST BE CLEANED AND PREPPED READY FOR WELDING PRIOR TO ASSEMBLY. -This kit is Designed for easy assembly for anyone with welding and fabrication abilities.   -The Kit is CNC notched, marked and labelled.   -Look at the images below for reference as to where the mounts sit, use this to gauge where to remove unused body components from, give your self a good size area to work with, then clean all the paint from the chassis in the areas of mounting, this will save lots of time.   -Using the images for reference position the hoop mounts in the car (may require some fettling to get a snug fit for welding)   -Your mounts can be tacked straight down to build up from.   -Now position the main roll bar (MRB) on the mount. Tack the bottom allowing movement to set the lean angle.   offer the LAB and LD to gauge the position of landing for the foot of LAB, mark this and then tack your front mount below it, measure the position and copy it on the drivers side (some trimming may be required for floor shape)   Now the front mounts are tacked in fit the front A bars (LAB/RAB) and the doorbars to ensure correct positioning. (ensure the A pillar is parallel to the tube and looks a nice fitment)   once this is secure fit RFB and tack in place.   once you have all roof components and doorbars in place you can weld around all visible joins. DO NOT WELD TUBES TO THE MOUNTS!   now the front is welded you can squeeze the cage together with a strap to give access to the joins between the body.   once the cage is fully welded you can remove the strap and push the legs back where they belong and fully weld them in place.   with the front of the cage fully welded and in position you can now build up the rest of the cage.   for the rear backstays, use the images for reference, the diagonals will help you set the correct width and the length of the bars will tell you where to land on the arch/strut. You will need to trim a small amount off the body where the backstay touches to allow the legs to land properly on the mount   the width between the 2 rear stay feet should be 1020mm centres   Offer your rear legs up to the positioning marks (RB and LB), tack them in place, then fit the any diagonal as required.   all additional bars can be located using the positioning marks and some element of common sense.   ensure everything is fully welded,  clean all the spatter and shes done!

GBP 1039.50
1

MK2 Triumph Spitfire Weld in Roll Cage kit (Material: LIGHTWEIGHT BS4-T45 - Unapproved for competition, Fitting: Yes)

MK2 Triumph Spitfire Weld in Roll Cage kit (Material: LIGHTWEIGHT BS4-T45 - Unapproved for competition, Fitting: Yes)

THIS IS A JOB FOR COMPETENT FABRICATORS ONLY! FITTING AVAILABLE Whats included? MRB – MAIN ROLL BAR LAB/RAB – LEFT/RIGHT A BARS (LATERAL ROLLBARS) RFB – ROOFBAR RB/LB – RIGHT/LEFT BACKSTAY (REAR LEGS) D1 – MAIN DIAGONALS (D1 TOP ALLWAYS GOES OVER DRIVERS HEAD) HB – HARNESS BAR LD/RD – LEFT/RIGHT DOORBARS LBP/RBP – LEFT/RIGHT B PILLAR DIAGONALS (HEAD HEIGHT CORNER BRACES BEHIND DRIVER AND PASSENGER HEAD) MOUNTS AND FOOT PLATES NOTE. SOME FETTLING MAY BE REQUIRED & ALL TUBES/ PLATES MUST BE CLEANED AND PREPPED READY FOR WELDING PRIOR TO ASSEMBLY. -This kit is Designed for easy assembly for anyone with welding and fabrication abilities.   -The Kit is CNC notched, marked and labelled.   -Look at the images below for reference as to where the mounts sit, use this to gauge where to remove unused body components from, give your self a good size area to work with, then clean all the paint from the chassis in the areas of mounting, this will save lots of time.   -Using the images for reference position the hoop mounts in the car (may require some fettling to get a snug fit for welding)   -Your mounts can be tacked straight down to build up from.   -Now position the main roll bar (MRB) on the mount. Tack the bottom allowing movement to set the lean angle.   offer the LAB and LD to gauge the position of landing for the foot of LAB, mark this and then tack your front mount below it, measure the position and copy it on the drivers side (some trimming may be required for floor shape)   Now the front mounts are tacked in fit the front A bars (LAB/RAB) and the doorbars to ensure correct positioning. (ensure the A pillar is parallel to the tube and looks a nice fitment)   once this is secure fit RFB and tack in place.   once you have all roof components and doorbars in place you can weld around all visible joins. DO NOT WELD TUBES TO THE MOUNTS!   now the front is welded you can squeeze the cage together with a strap to give access to the joins between the body.   once the cage is fully welded you can remove the strap and push the legs back where they belong and fully weld them in place.   with the front of the cage fully welded and in position you can now build up the rest of the cage.   for the rear backstays, use the images for reference, the diagonals will help you set the correct width and the length of the bars will tell you where to land on the arch/strut. You will need to trim a small amount off the body where the backstay touches to allow the legs to land properly on the mount   the width between the 2 rear stay feet should be 1020mm centres   Offer your rear legs up to the positioning marks (RB and LB), tack them in place, then fit the any diagonal as required.   all additional bars can be located using the positioning marks and some element of common sense.   ensure everything is fully welded,  clean all the spatter and shes done!

GBP 1984.50
1

BMW E46 COMPACT BOLT IN COMPETITION CAGE (Design Options: JPC3 - X rear, Double doorbars and centre brace, Colour: Specific RAL)

BMW E46 COMPACT BOLT IN COMPETITION CAGE (Design Options: JPC4 - X REAR, DOUBLE DOORBARS, A PILLAR SUPPORTS, Colour: Specific RAL)

BMW E46 COMPACT BOLT IN COMPETITION CAGE (Design Options: JPC1.5 (single diagonal, harness bar and single doorbars), Colour: Specific RAL)

BMW E46 COMPACT BOLT IN COMPETITION CAGE (Design Options: JPC1.5 (single diagonal, harness bar and single doorbars), Colour: Specific Metallic RAL)

BMW E46 COMPACT BOLT IN COMPETITION CAGE (Design Options: JPC3 - X rear, Double doorbars and centre brace, Colour: Specific Metallic RAL)

BMW E46 COMPACT BOLT IN COMPETITION CAGE (Design Options: JPC4 - X REAR, DOUBLE DOORBARS, A PILLAR SUPPORTS, Colour: Specific Metallic RAL)

Mercedes 190E Weld in Roll Cage kit (Material: LIGHTWEIGHT BS4-T45 - Unapproved for competition, Fitting: No)

Mercedes 190E Weld in Roll Cage kit (Material: LIGHTWEIGHT BS4-T45 - Unapproved for competition, Fitting: No)

THIS IS A JOB FOR COMPETENT FABRICATORS ONLY! FITTING AVAILABLE Whats included? MRB – MAIN ROLL BAR LAB/RAB – LEFT/RIGHT A BARS (LATERAL ROLLBARS) RFB – ROOFBAR RB/LB – RIGHT/LEFT BACKSTAY (REAR LEGS) D1,D2 &D3 – MAIN DIAGONALS (D1 TOP ALLWAYS GOES OVER DRIVERS HEAD) LH/RH – LEFT/RIGHT HARNESS BAR CD1,CD2 &CD3 – CENTRE DIAGONALS ( D1 TOP ALLWAYS GOES OVER DRIVERS HEAD) LUD/RUD – LEFT/RIGHT UPPER DOORBARS LLD/RLD – LEFT RIGHT LOWER DOORBARS RAPS/LAPS – LEFT/RIGHT A PILLAR SUPPORTS (PIT PROPS) RLAPS/LLAPS – LEFT RIGHT LOWER A PILLAR SUPPORTS (SMALL PEICE BETWEEN UPPER AND LOWER DOORBAR) LBP/RBP – LEFT/RIGHT B PILLAR DIAGONALS (HEAD HEIGHT CORNER BRACES BEHIND DRIVER AND PASSENGER HEAD) RD1,RD2 &RD3 – ROOF DIAGONALS (FRONT OF D1 ALWAYS DRIVERS SIDE) RRT/LRT – LEFT AND RIGHT REAR TRIANGULATION LFT/RFT – LEFT AND RIGHT FRONT TRIANGULATION WILL NEED SHAPING TO SUIT TURRETS) DB – DASH BAR CURVED CENTRE X GUSSETS DOORBAR GUSSETS 40MM A PILLAR GUSSETS  MOUNTS AND FOOT PLATES NOTE. SOME FETTLING MAY BE REQUIRED & ALL TUBES/ PLATES MUST BE CLEANED AND PREPPED READY FOR WELDING PRIOR TO ASSEMBLY. -This kit is Designed for easy assembly for anyone with welding and fabrication abilities.   -The Kit is CNC notched, marked and labelled.   -Look at the images below for reference as to where the mounts sit, use this to gauge where to remove unused body components from, give your self a good size area to work with, then clean all the paint from the chassis in the areas of mounting, this will save lots of time.   -For the main hoop mounts you need to neatly cut away part of the sheet metal as shown in the photos, this allows you to slide the mount in half and half, you can weld this to the mount once in place after the steps below.   -Your mounts can be tacked straight down to build up from.   -Now position the main roll bar (MRB) on the mount. Tack the bottom allowing movement to set the lean angle.   offer the LAB and LLD to gauge the position of landing for the foot of LAB, mark this and then tack your front mount below it, measure the position and copy it on the drivers side (some trimming may be required for floor shape)   Now the front mounts are tacked in fit the front A bars (LAB/RAB) and the doorbars to ensure correct positioning.   once this is secure fit all roof components and tack in place.   once you have all roof components and doorbars in place you can weld around all visible joins. DO NOT WELD ROUND THE MOUNTS OR FEET!   now you can break the mounts off the body and cage to remove, dropping the cage and allowing movement, you may need to ratchet strap the cage inwards to allow free movement to move the cage where needed to access all the hidden joins.   once the cage is fully welded you can lift the cage back up and re fit the mounts, ensuring to weld any joins before covering them up with the tube.   with the front of the cage fully welded and in position you can now build up the rest of the cage.   for the rear backstays, use the images for reference, the diagonals will help you set the correct width and the length of the bars will tell you where to land on the arch/strut.   Offer your rear legs up to the positioning marks (RB and LB), tack them in place, then fit the any diagonals as required.   all additional bars can be located using the positioning marks and some element of common sense.   ensure everything is fully welded, now fit any door bar gussets and pillar gussets, clean all the spatter and shes done!

GBP 2268.00
1